


Ready to ditch the personal Gmail for Google Email or Google Workspace Email? Here is the Google Email Domain Settings. Now get a professional email like yourname@yourcompany.com? Setting up email on Google Workspace is crucial. However, the process involves a few technical steps.
Here is a simple, easy-to-follow guide for setting up your professional email on Google Workspace Email.
The Google Email Domain Settings for your domain
Setting up Google email domain settings correctly is crucial for ensuring seamless email delivery, enhanced security, and professional communication for your business. Whether you are configuring a new domain or migrating to Google Workspace, proper domain settings such as MX records, SPF, DKIM, and DMARC play a crucial role in preventing email bounces, spam issues, and spoofing attacks.
In this guide, you’ll learn how to configure Google email for your domain step by step, verify domain ownership, and apply best-practice authentication settings. With the right configuration, your business emails will reach inboxes reliably while maintaining brand credibility and data security.
Phase 1: Purchase and Initial Google Email Domain Settings (Google Workspace)
You must complete these steps immediately after buying your plan.
- Sign Up: First, choose your Google Workspace plan (Starter, Standard, etc.) and complete the purchase.
- Verify Domain: You need to prove you own your company's domain name (e.g., namastu.com). Therefore, Google asks you to add a unique TXT record to your domain's DNS settings.
- Create Users: Next, you go to the Admin Console. You create all the necessary user accounts, such as sales@ and support@, for your team.
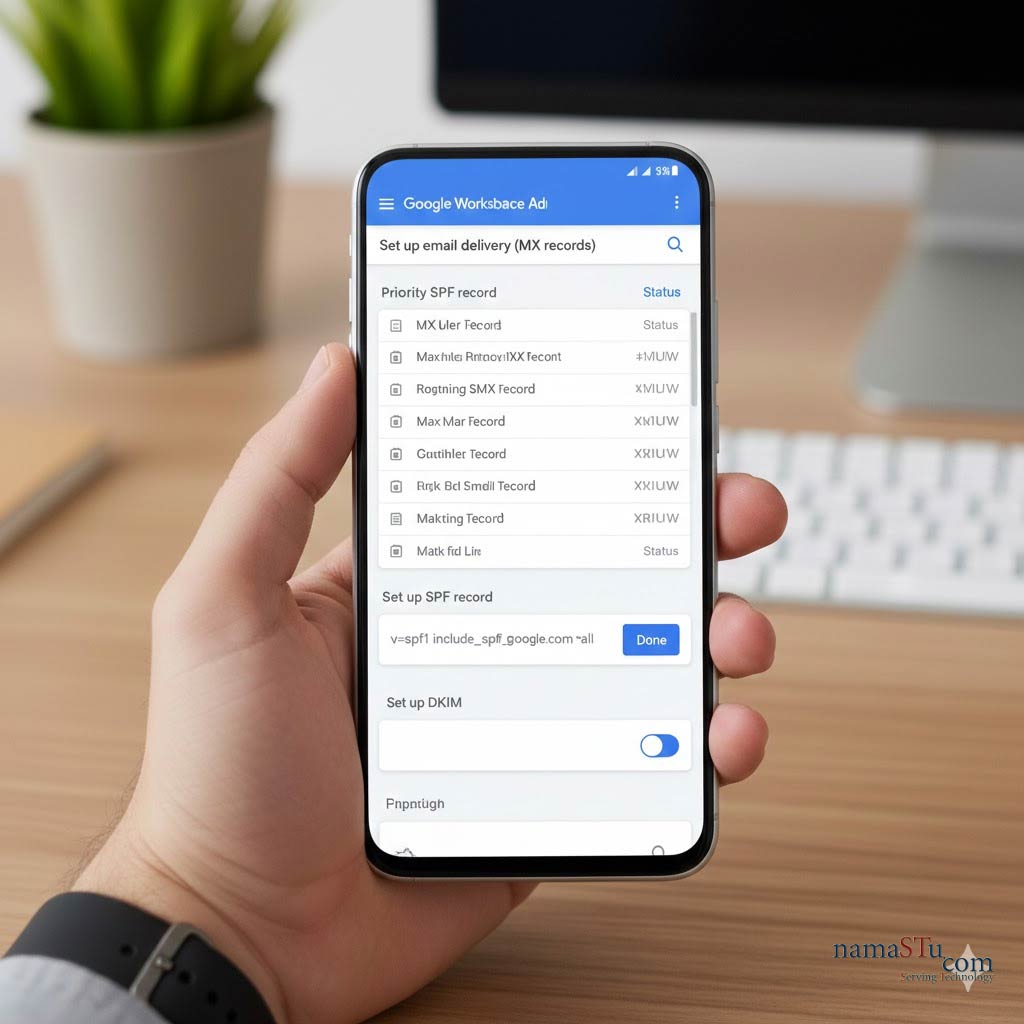
Phase 2: Directing Email to Google Email Settings (The Critical Step)
This step tells the entire internet to send mail for your domain to Google’s servers, not your old provider.
- Access DNS: Log in to your domain registrar (like GoDaddy, HostGator, or Namecheap). This is where you manage your domain.
- Locate MX Records: Find the section for managing MX (Mail Exchange) Records. MX records are like digital signposts for your email.
- Delete Old Records: Crucially, remove any existing MX records pointing to your old email service.
- Add Google's Records: Then, you must add five new MX records provided by Google. These records tell mail servers exactly where to deliver your email.
Example MX Records: (Note: You must use the ones Google provides)
- ASPMX.L.GOOGLE.COM (Priority 1)
- ALT1.ASPMX.L.GOOGLE.COM (Priority 5)
- ...and three others.
Phase 3: Wait and Finalise Google Email Settings
DNS changes take time to update across the internet. This waiting period is normal.
- Propagation: Wait for 24 to 48 hours. This is known as the DNS propagation time. During this time, the new MX records are being broadcast globally.
- Verify Activation: Return to your Google Workspace Admin Console. You click the button to verify Google Workspace Email MX Records for seamless incoming and outgoing. Consequently, Google confirms the changes and fully activates your email service.
- Start Sending: Finally, your new professional Gmail is ready to use! Your team logs in, and they can start sending and receiving emails immediately.
Tip: Use a Reseller for Help!
Setting up MX records can feel technical and confusing. Therefore, buying Google Workspace through an authorised partner like namaSTu.com is highly recommended. We handle all the DNS verification and MX record configuration for you. This ensures a zero-downtime transition.
Do you want a simple checklist of the five Google MX records you need to add to your DNS?